An API key from Cal.com Settings > Developer > API keys.
1
Create an API key in Cal.com
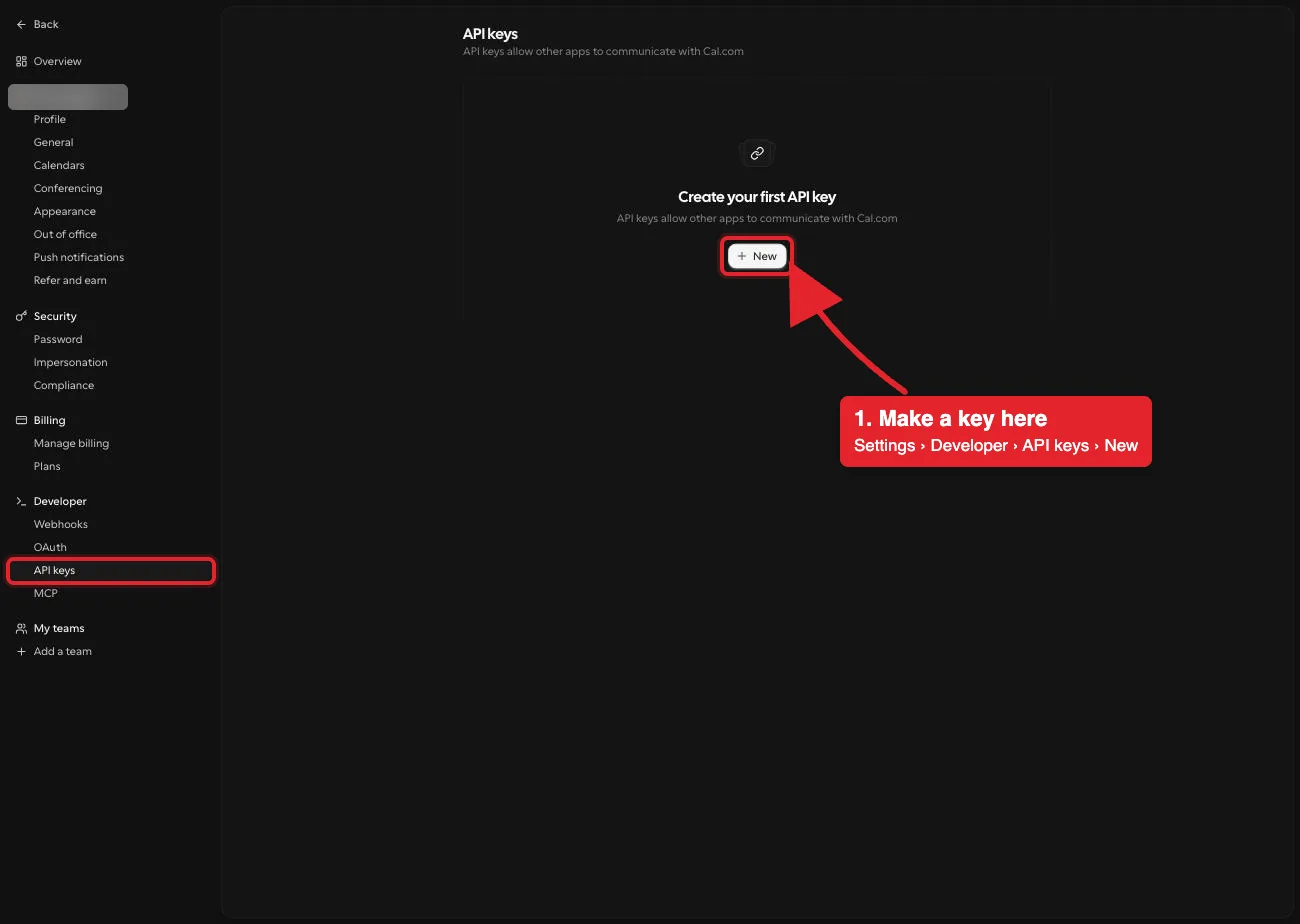
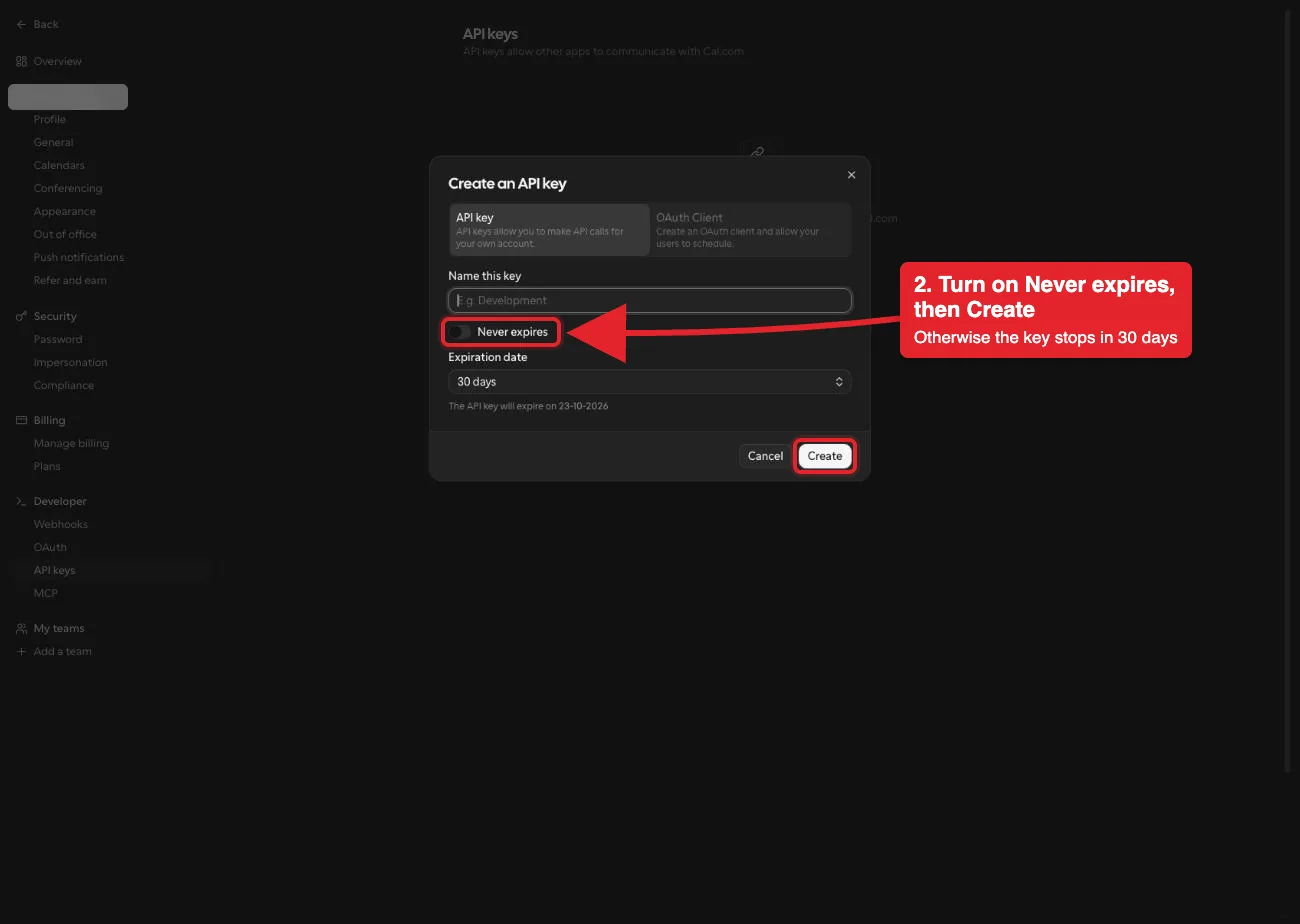
In Cal.com open Settings, then Developer, then API keys, and choose New. Name the key, turn on Never expires, and choose Create. Copy the key once. Without Never expires it stops working after 30 days.
Settings, then Developer, then API keys. New, marked in red, starts a key for your own account. The account name is blurred in this capture.
Name the key, turn on Never expires, and choose Create. A key left on the 30-day default stops working after a month.
2
Open Cal.com in Connections
Choose Connect or Add connection.
3
Enter the API key
Paste the key from Cal.com. ApexGenius supplies the API address and checks the key against your Cal.com profile.
4
Check the saved connection
Save after validation succeeds. Review the Tools tab. Booking, rescheduling and cancelling email the attendees.
Try a first question with your AI agent
List my upcoming Cal.com bookings for this week. Do not book, move or cancel anything.
Compare the bookings with your Cal.com Upcoming list. Reading bookings sends no emails.
The read route handles profiles, event types, bookings, schedules and open slots.
Booking, rescheduling and cancelling require an enabled write tool and email the
attendees. Review the account and meeting details before requesting a change.Official Cal.com API instructions.